
Key Points
-
Most problems in root canal treatment could have been avoided with care and attention to treatment principles. Careful examination of the pre-operative radiograph is essential.
-
It is possible to remove most fractured instruments, posts and failed root filings if the correct aids are to hand, and magnification is available.
-
It is essential that practitioners know the prognosis for different endodontic procedures, both from the endodontic literature and their own clinical experience.
Key Points
Endodontics
-
1
The modern concept of root canal treatment
-
2
Diagnosis and treatment planning
-
3
Treatment of endodontic emergencies
-
4
Morphology of the root canal system
-
5
Basic instruments and materials for root canal treatment
-
6
Rubber dam and access cavities
-
7
Preparing the root canal
-
8
Filling the root canal system
-
9
Calcium hydroxide, root resorption, endo-perio lesions
-
10
Endodontic treatment for children
-
11
Surgical endodontics
-
12
Endodontic problems
Abstract
If modern clinical techniques were carefully followed, many common endodontic problems would never occur. Incorrectly designed access cavities may make root canals both difficult to identify and to instrument. Careful study of the pre-operative radiograph is essential. Various aids are available to remove fractured instruments and failed root fillings, but the problem must first be correctly diagnosed. As more patients seek cosmetic procedures, the practitioner should be familiar with the 'walking bleach' procedure, again after careful diagnosis of the cause of the discolouration. The practitioner should also be fully aware of the prognosis for this and other endodontic procedures.
Main
Endodontics is a skill requiring the use of delicate instruments in confined spaces. Inevitably, problems will occur, but many of these are avoidable providing the operator exercises care and patience. A few tips on how to overcome some of these problems will be given in this part. Should the reader require a more wide-ranging and detailed account, specialist endodontic textbooks on this subject may be referred to.1
Access
It is important to have good visual access and sufficient space to allow direct line access into the apical third of the root canal. A useful way of assessing a patient for molar endodontics is that the operator should be able to place two fingers between the maxillary and mandibular incisors. If this is not possible owing to a small mouth or limited opening, then it may be unwise to commence root canal therapy. Assessing access for posterior surgical endodontics may be done by retracting the lip at the corner of the mouth with a finger; the surgical area should be directly visible.
The general guidelines for access cavities have already been discussed in Part 6. However, there are occasions when these should be adapted to suit a particular case. Inadequate access will lead to poor treatment and, unless the endodontic treatment is successful, further restoration of the tooth is irrelevant.
Before cutting the access cavity, the extent and type of final restoration should be borne in mind. If an anterior tooth will require a crown following the root treatment, the access cavity could be cut on the labial surface (Fig. 1). In posterior teeth it may be advantageous to reduce the walls, if either they are already weakened or there is a crown or root fracture.

a) A resin-retained bridge had been fitted to replace UL1 (21) lost through trauma. When a periapical lesion developed related to UR1 (11), an access cavity was cut through the incisal edge. b) The last standing teeth are to be cut down for overdenture abutment.
Locating and negotiating fine canals
Many root canals, particularly in the elderly patient, are difficult to locate. The pulp chambers may be sclerosed or contain large pulp stones and the root canals may be so fine that even when located they are difficult to negotiate.
Dentine deposition occurs as a response to any moderate injury to the pulp, in particular luxation injuries. Initially, the pulp chamber reduces in size, followed by a gradual narrowing of the root canals. The incidence of pulpal necrosis following canal obliteration is not high and so does not warrant intervention by elective root canal treatment.2
Radiographs of teeth showing apparent total canal obliteration are deceptive (Fig. 2). Cvek et al. report a study in which attempts were made to locate and negotiate root canals which were not visible on the pre-operative radiographs.3 In 54 incisors with periapical lesions, the root canal was located and treated in all but one of them.

A radiograph of tooth UL1 (21), which suffered trauma 5 years previously, showing no apparent sign of a root canal system.
These narrow canals may take time to locate. The pre-operative radiograph contains useful information: the size, curvature and position of the root canal(s) in relation to the pulp chamber may be noted. A meticulous search must be made of the floor of the pulp chamber with either an endodontic (DG16) probe or an 08 or 10 file. The floor of the pulp chamber is darker than the walls and the canal entrances are situated, in posterior teeth, at each corner. Fibre-optic light, transilluminating the tooth, and magnification using either binocular loupes or an operating microscope as discussed in Part 4 are also of assistance.
If the canal cannot be located, an ultrasonic tip as described in Part 5 may be used to break down secondary dentine from the floor of the pulp chamber around the anticipated canal opening. As a final resort it will be necessary to drill using a small, round bur in a slow running standard handpiece. A bur hole, approximately 2 mm in depth, is then drilled at the expected site of the canal along the main axis of the root. A radiograph is taken with the bur in situ and the direction of the bur corrected if further drilling is necessary. This can be a frustrating exercise and numerous fine files will be damaged as the tips curve in the round shape produced by the bur. The associated risks of perforation do mean that this really is a 'last resort', as shown in Figure 3.

A small, round bur was used to explore the area, and an orifice was found. Unfortunately a radiograph revealed that a perforation into the furcation had been created. As the pulp chamber was clean and well isolated, the perforation was repaired with resin-modified glass-ionomer cement and the tooth remained symptomless.
Once the entrance has been located, the next step is to negotiate the canal using a fine instrument. A curve is placed at the tip of an 06 or 08 hand file. It is useful to dip the tip of the instrument into a lubricant such as Hibiscrub. The instrument is gradually advanced into the canal using a small, contrarotating, 'watchwinding' movement to advance the file. Force should not be used. The curve in the instrument tip will seek the path of least resistance and allow the instrument to penetrate further into the canal. A push—pull filing motion may then be used to free coronal obstructions in the canal. The file is removed, copious irrigation used and the procedure repeated until the canal is negotiated to the working length. If an electronic apex locator is not being used it will be necessary to enlarge the canal with successively larger fine instruments up to a size 15 before confirming the working length, as an 06 file may not be seen accurately on a diagnostic radiograph.
EDTA paste (ethylenediamine tetra-acetic acid) is not recommended for the initial negotiation of the canal, as it is a chelating agent. The walls of the dentine will be softened, which means a false canal could be cut. EDTA paste is, however, extremely useful when preparing the canal walls once the full length has been negotiated.
Ledged or blocked canals
Incorrect technique in preparation can lead to either obstruction of the root canal with pulpal debris, compacted dentine and other debris, or the formation of a ledge in the wall of the canal.
In the case of a ledged canal (Fig. 4), a curve should be placed near the tip of a fine hand instrument, the canal irrigated with sodium hypochlorite, and the instrument inserted into the canal. The notch in the rubber stop should be aligned with the curve so that the instrument tip may be directed away from the ledge and gradually advanced with small contrarotating movements. Once the instrument is beyond the ledge a short push–pull filing motion is used to reduce the ledge in the curve before removing the file. A lubricant such as EDTA paste is useful to help remove the ledge. This is not a difficult procedure once the ledge has been bypassed. A canal that has been blocked with pulpal or dentine debris may well be impossible to negotiate. Copious irrigation, the use of EDTA paste and a very fine instrument may be tried. The danger is of either packing the debris harder into the canal or creating a false canal.

If the file is rotated through 180° the curved tip will follow the original canal.
Re-root treatment
A root filling may have to be removed and the tooth retreated for a variety of reasons. The patient may be experiencing symptoms, a periapical radiolucency may be increasing in size, or the coronal restoration may require replacing in a tooth where the root filling is inadequate. Whatever the reason, the first step is to identify the type of filling material that has been used (Fig. 5) and to assess the difficulty of the procedure. The method used to remove the previous root filling will depend on the type of material used.

The operator must be able to distinguish between various root-filling materials by their radiographic appearance.
Paste
A soft root-filling material may be removed easily with Hedstroem files and copious irrigation.
Cement
Some cements set hard and have apparently no solvent and, as a result, are almost impossible to remove. The first stage in attempting to remove a cement is to flood the canal entrance with chloroform or xylene and use an endodontic probe and then Hedstroem files. If this fails, the coronal 2–3 mm can be removed with a small rosehead bur followed by files. Alternatively, ultrasonics may be used to break down the cement and flush out the debris. It may, however, prove impossible to negotiate a canal filled with a hard setting cement.
Gutta-percha
Gutta-percha is simple to remove. Gates–Glidden burs may be used first to gain access to the root canal. The burs both cut away gutta-percha, and soften it by the frictional heat of rotation. There are various solvents for gutta-percha, which may be dispensed into a Dappens dish and picked up on the tip of each instrument. Chloroform, halothane and xylene may be available in the surgery, or oil of eucalyptus and oil of turpentine are both effective. Once access has been made it is usually possible to remove the remainder of the gutta-percha with conventional filing techniques.
Alternatively, nickel-titanium rotary instruments are very efficient for softening and removing gutta-percha from canals that will accommodate them. Initial exploration with hand files is necessary to create room for the cutting flutes of the instruments. They should not be used to path-find. The piezo-electric ultrasonic machines are also useful as their heat generation aids removal of softened gutta-percha. Specially designed tips are available for this procedure.
If the original gutta-percha filling has been extended beyond the apical foramen, removal may prove impossible. One method proposed for this situation involves first creating a gap between the material and the wall of the canal with a canal probe. A Hedstroem file may then be carefully 'screwed' into the space. A second and, if possible, third file are similarly inserted into the mass of the gutta-percha. The handles of the files are grasped, and a steady withdrawal force exerted to remove the gutta-percha point(s). Hedstroem files are needed to grip and pull back the gutta-percha.
Metal points
The method of removing silver or titanium points is dictated by their position within the root canal. Silver points are easier to remove if there has been leakage of tissue fluids into the canal and corrosion has occurred.
The simplest situation is when the coronal end of the point protrudes far enough into the pulp chamber so that it may be grasped by either Steiglitz forceps (Fig. 6), narrow-beaked artery forceps or fine pliers.

Steiglitz forceps have long narrow beaks, and are useful for grasping broken instruments in the pulp chamber.
If the point lies in the root canal below the pulp chamber but in a straight part of the canal, attempts should be made to bypass and either remove the point or incorporate it into the root filling. A size 08 or 10 file or reamer is used, and the tip is coated with EDTA paste. If the point can be bypassed, it can frequently be removed with Hedstroem files or by using an ultrasonic technique. CPR® Ultrasonic tips (described in Part 5) are ideal for accessing and dislodging points and broken instruments.
Alternatively, two fine devices are available to assist in removal of such impediments. The Cancellier kit contains four fine hollow tubes which may fit over a loosened point in the canal enabling its withdrawal. The Meitrac Endo Safety System involves the use of a mini-trephine to free the tip of the fractured point. This may then be gripped using two 'locking' tubes and withdrawn.
Unless an operating microscope is used, it is seldom possible to remove a point which is lodged in the apical third of a curved root canal. Attempts should be made either to bypass the fragment and incorporate it into the root filling, or condense gutta-percha vertically up to the obstruction, with a view to apical surgery should signs of failure occur.
Fractured instruments
The time required to remove or bypass a fractured instrument from the root canal far outweighs the simple precautions that should be taken routinely to prevent such an occurrence. The simple rules which will prevent instrument fracture are as follows.
-
1
Each time an endodontic instrument is picked up it should be visually checked for any damage or deformation of the twisted flutes (Fig. 7). The assistance of a well-trained dental nurse can be invaluable. Damaged instruments should be discarded immediately.
Figure 7 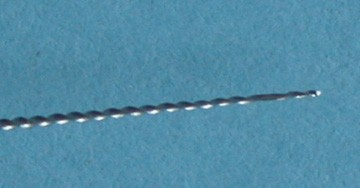
Files should be visually inspected for damage to the flutes every time they are removed from the tooth for cleaning.
-
2
Never force an instrument in the canal.
-
3
Do not miss out sizes. Although appearing small, moving from a size 10 to a size 15 file involves an increase in tip diameter of 50%. It is preferable to repeat the use of the smaller file than apply excess force to the next size.
-
4
When using the balanced force technique, limit rotations to 60° as described by Roane et al. and never rotate an instrument more than one quarter turn in a clockwise direction.4

The techniques used for removal of a fractured instrument are similar to those described previously for metal points. In addition, the Masserann was specifically designed to extract metal fragments from root canals. The Masserann kit (Fig. 8) consists of a number of trepans with a range of diameters from 1.1 mm to 2.4 mm. The trepans are hollow tubes designed to cut a trough around the metal fragment (Fig. 9). Note that the trepans are designed to be used with an anticlockwise rotation. This will assist with the removal of any threaded materials which will have a conventional thread. The operator should be particularly aware of this as a potential problem if attempting to remove a fractured Hand File of Greater Taper, which have a reverse thread.

A Masserann kit for removal of fractured instruments and posts.

The tip of the Masserann trepan showing the cutting flutes, designed to cut in an anticlockwise direction.
The trough usually has to be cut along at least half the length of the fragment before it is sufficiently loosened to allow its extraction. It is recommended that the trepan is operated by hand, using the special handle provided, and not placed in a handpiece. A feeler gauge from the kit is used to judge the size of the trepan required. EDTA paste will help to lubricate and soften the dentine. The kit also contains a Masserann extractor, which is placed over the end of the loosened fragment so that it may be gripped and removed. If the fragment is too large for the extractor, then a size smaller trepan may be forced over the end of the fragment, which is then gripped firmly enough to allow its withdrawal from the canal. However, the operator must weigh the benefits of this procedure against the damage to the trepan.
A fractured instrument remaining in a canal does not mean that the attempt at root treatment will fail. It has been demonstrated that, provided the remainder of the root canal is filled conventionally, the success rate is not significantly affected.5,6
Posts
A post may have to be removed because either the tooth requires (re)root filling or the post has fractured. The procedure presents problems as there is a danger of fracturing or perforating the root of the tooth. Threaded posts which have fractured can be removed by cutting a groove in the post end and unscrewing. It is possible to extract a smooth-sided post and core using a post extractor (Fig. 10).

Post extractors for dismantling post-crowns: a) the Ruddle, and b) the Eggler systems.
A piezo-electric ultrasonic system, used with special tips, should first be used at the appropriate power setting. Moving the tips around the base of the post at moderate power will remove cement around the post. A different tip may then be used to apply maximum vibratory energy to the post in an attempt to vibrate the post loose directly.
With the Eggler system, the core must first be shaped so that its sides are parallel and capable of being gripped. The mesial and distal shoulders of the crown preparation must be cut to the same height so there is no torsional force. The post extractor is then placed over the post and the screw tightened onto the core; the feet are then lowered on to the shoulders of the preparation by turning the end knob. Several more turns will ease the post out of the post hole.
With the Ruddle system, a trephine is used to produce a parallel side in the post, which is then grasped in a matching sized thread cutting tap to a maximum depth of 3 mm. The post removal pliers are placed over a rubber cushion, and gently tightened. If removal is difficult, further ultrasonic energy may be applied. As with all such instruments, there is a danger of root fracture, and expertise should be gained in a technical laboratory before attempting these techniques in a clinical situation.
A fractured post lying within the root canal may either be drilled out using a high-speed handpiece, which is a hazardous procedure, or removed with a Masserann kit as described earlier. Figure 11 shows the initial radiograph of the fractured post, and the item successfully removed with the Masseran kit.

A fractured post successfully removed with the Masseran kit.
Vertical root fracture
Although infrequent, this problem may be difficult to diagnose. The patient may present with mild symptoms, or it may appear that the root canal treatment has not been successful. Cases have been reported where the first indication of a vertical root fracture has been when a muco-periosteal flap has been raised to carry out peri-radicular surgery on an apparently persistent lesion. Figure 12 in Part 2 shows a tooth with such a fracture which had to be extracted.

A radiograph of a molar with a vertical root fracture, showing the pathognomonic appearance of periodontitis surrounding the entire root.
The diagnosis can, however, be suspected when a radiograph shows bone loss extending all around a root or a tooth, as in Figure 12. The vertical defect has led to bacterial contamination of the entire tooth surface.
The discolored root-filled tooth
Bleaching and tooth-whitening procedures are rapidly becoming a part of every dentist's practice. The routine use of such materials in restorative dentistry is outside the scope of this text, and the subject is comprehensively covered in other books.7,8 However, teeth which have been root filled may darken for various reasons, and may benefit from internal bleaching using the technique known as 'walking bleach'. An illustration of the potential can be seen in Figure 13.

Figure courtesy of Dr M Elkhazindar, Glasgow Dental Hospital.
It is essential wherever possible to identify the cause of the discoloration. Some of those specifically due to endodontics may be:9
-
Internal haemorrhage within the dentine following trauma;
-
Seepage of toxins from the infected pulpal contents;
-
Staining from medicaments, cements, etc., particularly those containing silver;
-
The optical effects of dehydration.
Briefly, the normally recommended technique is as follows:
-
1
Clean and polish all the teeth thoroughly to remove any extrinsic stain.
-
2
Match the existing shade of the tooth with a ceramic shade guide (if possible with an intra-oral photograph of the tooth and tab).
-
3
Isolate the tooth with rubber dam, sealing the margins carefully around the teeth with a caulking agent.
-
4
Remove the restoration from the access cavity, ensuring that all aspects are clean.
-
5
Clean out all endodontic materials from the pulp chamber, to a depth of 2 mm into the root canal.
-
6
Seal the root filling with a layer of glass-ionomer cement of the lightest shade.
-
7
Soak a cotton pledget in 30% hydrogen peroxide and place in the access cavity.
-
8
Apply a heated instrument to the pledget, and repeat the process several times. (Note that in a recent comprehensive review of this procedure Attin et al. suggest that the use of 30% hydrogen peroxide and the application of heat may both contribute to the initiation of cervical resorption.10)
-
9
Place a mixture of sodium perborate and 3% hydrogen peroxide in the pulp chamber, and seal it in place with a non-eugenol temporary cement. This constitutes the 'walking-bleach' phase of the procedure.
-
10
Review the patient after one week, and measure the change in colour.
-
11
The procedure may require repeating several times.
-
12
The access cavity should be restored completely with the lightest paediatric shade of composite resin.
Prognosis in Endodontics
All endodontic procedures should be reviewed as part of audit and clinical governance. An assessment of the degree of healing or otherwise must be made, and unsatisfactory results may require either further monitoring or retreatment. However, it should be noted that Ørstavik reported that over 75% of apical periodontitis lesions developing after endodontic treatment can be observed radiographically after one year.11 It may be considered therefore that if healing is evident after one year, further radiographic monitoring is not indicated.
One method of monitoring would be to employ the Periapical Index (PAI) described by Ørstavik at al.12 Standard radiographic views are presented of five apical conditions, and the operator compares their own result with these standards. A score of 1 indicates normal periapical appearance; 2 indicates slight disorganization of the bone texture; 3 loss of bone and unusual bone pattern; 4 shows classic periapical periodontitis; and 5 is similar, but with obvious wider spread.
Many studies have been reported on the success of endodontic treatment, many assessing the result against the PAI. Friedman reports a comprehensive review of these studies, and the weighted averages are summarized in Table 1.13 Particular note should be made of the significantly reduced weighted average prognosis when treating teeth presenting with an established area of periapical periodontitis seen on radiographic examination. These figures should be studied by the clinician, and an estimate of the likely prognosis should form part of the procedure of obtaining informed or valid consent.
References
Guttman, JL, Dumsha TC, Lovdahl PE, Hovland EJ . Problem Solving in Endodontics. 3rd Ed. St Louis: Mosby, 1997.
Andreasen JO, Andreasen FM . Chapter 9 in Textbook and colour atlas of traumatic injuries to the teeth. 3rd Ed. Denmark: Munksgard, 1994.
Cvek M, Granath L-E, Lundberg M . Failures and healing in endodontically treated non-vital anterior teeth with post-traumatically reduced pulpal lumen. Acta Odont Scand 1982; 40: 223–228.
Roane JB, Sabala CL, Duncanson MG . The balanced force concept for instrumentation of curved canals. J Endod 1985; 11: 203–211
Crump MC, Natkin E . Relationship of broken root canal instruments to endodontic case prognosis: a clinical investigation. J Am Dent Assoc 1970; 80: 1341–1347.
Lumley PJ . Management of silver points and fractured instruments. CPD Dentistry 2000; 1: 87–92.
Greenwall L . Bleaching techniques in restorative dentistry. London: Martin Dunitz, 2001.
Sheets CG, Paquette, JM, Wright RS . Chapter 21 in Cohen S & Burns R C. Pathways of the Pulp, Eighth Ed. St Louis: Mosby, 2002.
Nathoo SA . The chemistry and mechanisms of extrinsic and intrinsic discoloration. J Am Dent Assoc 1997; 128: 6S–10S.
Attin T, Paqué F, Ajam F, Lennon Á . Review of the current status of tooth whitening with the walking bleach technique. Int End J 2003; 36: 313–329.
Ørstavik D . Time-course and risk analyses of the development and healing of chronic apical periodontitis in man. Int Endod J 1996; 29: 150–155
Ørstavik D, Kerekes K and Eriksen HM . The periapical index: A scoring system for radiographic assessment of periapical periodontitis. Endod Dent Traumatol 18; 2: 20–34.
Friedman S . Treatment outcome and prognosis of endodontic therapy. In Ørstavik D, Pitt Ford T R, Essential Endodontology. Oxford: Blackwell Science, 1998.
Author information
Authors and Affiliations
Corresponding author
Additional information
Refereed Paper
Rights and permissions
About this article
Cite this article
Carrotte, P. Endodontic problems. Br Dent J 198, 127–133 (2005). https://doi.org/10.1038/sj.bdj.4812037
Published:
Issue Date:
DOI: https://doi.org/10.1038/sj.bdj.4812037
This article is cited by
-
Pre- and postoperative management techniques. Part 3: Before and after — Endodontic surgery
British Dental Journal (2015)
